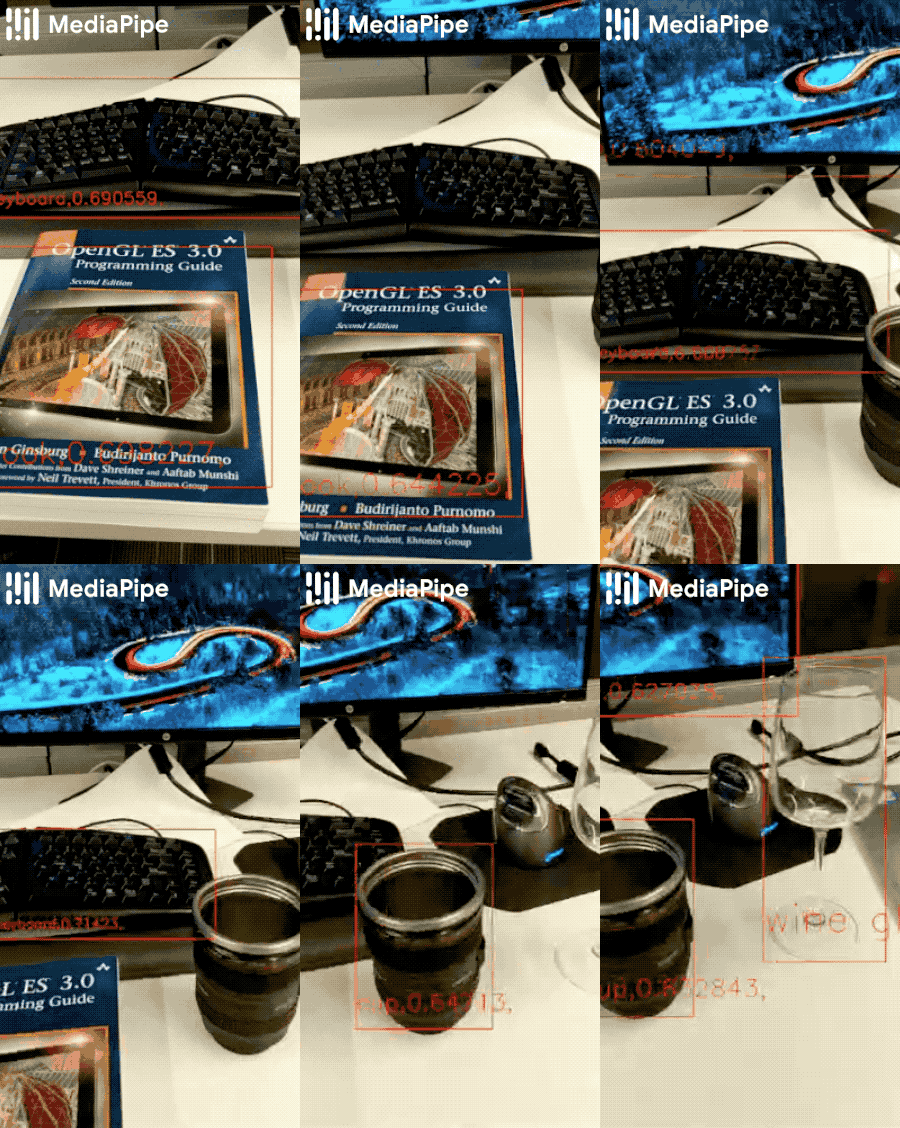
6.7 KiB
| layout | title | parent | nav_order |
|---|---|---|---|
| default | Object Detection | Solutions | 9 |
MediaPipe Object Detection
{: .no_toc }
Table of contents
{: .text-delta } 1. TOC {:toc}Example Apps
Note: To visualize a graph, copy the graph and paste it into MediaPipe Visualizer. For more information on how to visualize its associated subgraphs, please see visualizer documentation.
Mobile
Please first see general instructions for Android and iOS on how to build MediaPipe examples.
GPU Pipeline
- Graph:
mediapipe/graphs/object_detection/object_detection_mobile_gpu.pbtxt - Android target:
(or download prebuilt ARM64 APK)
mediapipe/examples/android/src/java/com/google/mediapipe/apps/objectdetectiongpu:objectdetectiongpu - iOS target:
mediapipe/examples/ios/objectdetectiongpu:ObjectDetectionGpuApp
CPU Pipeline
This is very similar to the GPU pipeline except that at the beginning and the end of the pipeline it performs GPU-to-CPU and CPU-to-GPU image transfer respectively. As a result, the rest of graph, which shares the same configuration as the GPU pipeline, runs entirely on CPU.
- Graph:
mediapipe/graphs/object_detection/object_detection_mobile_cpu.pbtxt) - Android target:
(or download prebuilt ARM64 APK)
mediapipe/examples/android/src/java/com/google/mediapipe/apps/objectdetectioncpu:objectdetectioncpu - iOS target:
mediapipe/examples/ios/objectdetectioncpu:ObjectDetectionCpuApp
Desktop
Live Camera Input
Please first see general instructions for desktop on how to build MediaPipe examples.
- Graph:
mediapipe/graphs/object_detection/object_detection_desktop_live.pbtxt - Target:
mediapipe/examples/desktop/object_detection:object_detection_cpu
Video File Input
-
With a TFLite Model
This uses the same TFLite model (see also model info) as in Live Camera Input above. The pipeline is implemented in this graph, which differs from the live-camera-input CPU-based pipeline graph simply by the additional
OpenCvVideoDecoderCalculatorandOpenCvVideoEncoderCalculatorat the beginning and the end of the graph respectively.To build the application, run:
bazel build -c opt --define MEDIAPIPE_DISABLE_GPU=1 mediapipe/examples/desktop/object_detection:object_detection_tfliteTo run the application, replace
<input video path>and<output video path>in the command below with your own paths:Tip: You can find a test video available in
mediapipe/examples/desktop/object_detection.GLOG_logtostderr=1 bazel-bin/mediapipe/examples/desktop/object_detection/object_detection_tflite \ --calculator_graph_config_file=mediapipe/graphs/object_detection/object_detection_desktop_tflite_graph.pbtxt \ --input_side_packets=input_video_path=<input video path>,output_video_path=<output video path> -
With a TensorFlow Model
This uses the TensorFlow model ( see also model info), and the pipeline is implemented in this graph.
Note: The following runs TensorFlow inference on CPU. If you would like to run inference on GPU (Linux only), please follow TensorFlow CUDA Support and Setup on Linux Desktop instead.
To build the TensorFlow CPU inference example on desktop, run:
Note: This command also builds TensorFlow targets from scratch, and it may take a long time (e.g., up to 30 mins) for the first time.
bazel build -c opt --define MEDIAPIPE_DISABLE_GPU=1 --define no_aws_support=true --linkopt=-s \
mediapipe/examples/desktop/object_detection:object_detection_tensorflow
To run the application, replace
<input video path>and<output video path>in the command below with your own paths:Tip: You can find a test video available in
mediapipe/examples/desktop/object_detection.GLOG_logtostderr=1 bazel-bin/mediapipe/examples/desktop/object_detection/object_detection_tflite \ --calculator_graph_config_file=mediapipe/graphs/object_detection/object_detection_desktop_tensorflow_graph.pbtxt \ --input_side_packets=input_video_path=<input video path>,output_video_path=<output video path>
Coral
Please refer to these instructions to cross-compile and run MediaPipe examples on the Coral Dev Board.
