779 lines
26 KiB
Markdown
779 lines
26 KiB
Markdown
---
|
|
layout: default
|
|
title: Hello World! on Android
|
|
parent: MediaPipe on Android
|
|
grand_parent: Getting Started
|
|
nav_order: 1
|
|
---
|
|
|
|
# Hello World! on Android
|
|
{: .no_toc }
|
|
|
|
1. TOC
|
|
{:toc}
|
|
---
|
|
|
|
## Introduction
|
|
|
|
This codelab uses MediaPipe on an Android device.
|
|
|
|
### What you will learn
|
|
|
|
How to develop an Android application that uses MediaPipe and run a MediaPipe
|
|
graph on Android.
|
|
|
|
### What you will build
|
|
|
|
A simple camera app for real-time Sobel edge detection applied to a live video
|
|
stream on an Android device.
|
|
|
|
|
|
|
|
## Setup
|
|
|
|
1. Install MediaPipe on your system, see
|
|
[MediaPipe installation guide](./install.md) for details.
|
|
2. Install Android Development SDK and Android NDK. See how to do so also in
|
|
[MediaPipe installation guide].
|
|
3. Enable [developer options] on your Android device.
|
|
4. Setup [Bazel] on your system to build and deploy the Android app.
|
|
|
|
## Graph for edge detection
|
|
|
|
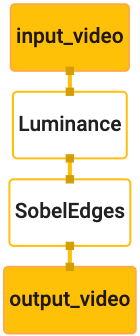
We will be using the following graph, [`edge_detection_mobile_gpu.pbtxt`]:
|
|
|
|
```
|
|
# MediaPipe graph that performs GPU Sobel edge detection on a live video stream.
|
|
# Used in the examples in
|
|
# mediapipe/examples/android/src/java/com/mediapipe/apps/basic and
|
|
# mediapipe/examples/ios/edgedetectiongpu.
|
|
|
|
# Images coming into and out of the graph.
|
|
input_stream: "input_video"
|
|
output_stream: "output_video"
|
|
|
|
# Converts RGB images into luminance images, still stored in RGB format.
|
|
node: {
|
|
calculator: "LuminanceCalculator"
|
|
input_stream: "input_video"
|
|
output_stream: "luma_video"
|
|
}
|
|
|
|
# Applies the Sobel filter to luminance images stored in RGB format.
|
|
node: {
|
|
calculator: "SobelEdgesCalculator"
|
|
input_stream: "luma_video"
|
|
output_stream: "output_video"
|
|
}
|
|
```
|
|
|
|
A visualization of the graph is shown below:
|
|
|
|
|
|
|
|
This graph has a single input stream named `input_video` for all incoming frames
|
|
that will be provided by your device's camera.
|
|
|
|
The first node in the graph, `LuminanceCalculator`, takes a single packet (image
|
|
frame) and applies a change in luminance using an OpenGL shader. The resulting
|
|
image frame is sent to the `luma_video` output stream.
|
|
|
|
The second node, `SobelEdgesCalculator` applies edge detection to incoming
|
|
packets in the `luma_video` stream and outputs results in `output_video` output
|
|
stream.
|
|
|
|
Our Android application will display the output image frames of the
|
|
`output_video` stream.
|
|
|
|
## Initial minimal application setup
|
|
|
|
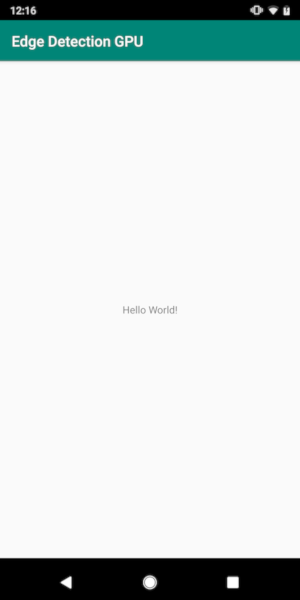
We first start with an simple Android application that displays "Hello World!"
|
|
on the screen. You may skip this step if you are familiar with building Android
|
|
applications using `bazel`.
|
|
|
|
Create a new directory where you will create your Android application. For
|
|
example, the complete code of this tutorial can be found at
|
|
`mediapipe/examples/android/src/java/com/google/mediapipe/apps/basic`. We
|
|
will refer to this path as `$APPLICATION_PATH` throughout the codelab.
|
|
|
|
Note that in the path to the application:
|
|
|
|
* The application is named `helloworld`.
|
|
* The `$PACKAGE_PATH` of the application is
|
|
`com.google.mediapipe.apps.basic`. This is used in code snippets in this
|
|
tutorial, so please remember to use your own `$PACKAGE_PATH` when you
|
|
copy/use the code snippets.
|
|
|
|
Add a file `activity_main.xml` to `$APPLICATION_PATH/res/layout`. This displays
|
|
a [`TextView`] on the full screen of the application with the string `Hello
|
|
World!`:
|
|
|
|
```
|
|
<?xml version="1.0" encoding="utf-8"?>
|
|
<android.support.constraint.ConstraintLayout xmlns:android="http://schemas.android.com/apk/res/android"
|
|
xmlns:app="http://schemas.android.com/apk/res-auto"
|
|
xmlns:tools="http://schemas.android.com/tools"
|
|
android:layout_width="match_parent"
|
|
android:layout_height="match_parent">
|
|
|
|
<TextView
|
|
android:layout_width="wrap_content"
|
|
android:layout_height="wrap_content"
|
|
android:text="Hello World!"
|
|
app:layout_constraintBottom_toBottomOf="parent"
|
|
app:layout_constraintLeft_toLeftOf="parent"
|
|
app:layout_constraintRight_toRightOf="parent"
|
|
app:layout_constraintTop_toTopOf="parent" />
|
|
|
|
</android.support.constraint.ConstraintLayout>
|
|
```
|
|
|
|
Add a simple `MainActivity.java` to `$APPLICATION_PATH` which loads the content
|
|
of the `activity_main.xml` layout as shown below:
|
|
|
|
```
|
|
package com.google.mediapipe.apps.basic;
|
|
|
|
import android.os.Bundle;
|
|
import androidx.appcompat.app.AppCompatActivity;
|
|
|
|
/** Bare-bones main activity. */
|
|
public class MainActivity extends AppCompatActivity {
|
|
|
|
@Override
|
|
protected void onCreate(Bundle savedInstanceState) {
|
|
super.onCreate(savedInstanceState);
|
|
setContentView(R.layout.activity_main);
|
|
}
|
|
}
|
|
```
|
|
|
|
Add a manifest file, `AndroidManifest.xml` to `$APPLICATION_PATH`, which
|
|
launches `MainActivity` on application start:
|
|
|
|
```
|
|
<?xml version="1.0" encoding="utf-8"?>
|
|
<manifest xmlns:android="http://schemas.android.com/apk/res/android"
|
|
package="com.google.mediapipe.apps.basic">
|
|
|
|
<uses-sdk
|
|
android:minSdkVersion="19"
|
|
android:targetSdkVersion="19" />
|
|
|
|
<application
|
|
android:allowBackup="true"
|
|
android:label="${appName}"
|
|
android:supportsRtl="true"
|
|
android:theme="@style/AppTheme">
|
|
<activity
|
|
android:name="${mainActivity}"
|
|
android:exported="true"
|
|
android:screenOrientation="portrait">
|
|
<intent-filter>
|
|
<action android:name="android.intent.action.MAIN" />
|
|
<category android:name="android.intent.category.LAUNCHER" />
|
|
</intent-filter>
|
|
</activity>
|
|
</application>
|
|
|
|
</manifest>
|
|
```
|
|
|
|
In our application we are using a `Theme.AppCompat` theme in the app, so we need
|
|
appropriate theme references. Add `colors.xml` to
|
|
`$APPLICATION_PATH/res/values/`:
|
|
|
|
```
|
|
<?xml version="1.0" encoding="utf-8"?>
|
|
<resources>
|
|
<color name="colorPrimary">#008577</color>
|
|
<color name="colorPrimaryDark">#00574B</color>
|
|
<color name="colorAccent">#D81B60</color>
|
|
</resources>
|
|
```
|
|
|
|
Add `styles.xml` to `$APPLICATION_PATH/res/values/`:
|
|
|
|
```
|
|
<resources>
|
|
|
|
<!-- Base application theme. -->
|
|
<style name="AppTheme" parent="Theme.AppCompat.Light.DarkActionBar">
|
|
<!-- Customize your theme here. -->
|
|
<item name="colorPrimary">@color/colorPrimary</item>
|
|
<item name="colorPrimaryDark">@color/colorPrimaryDark</item>
|
|
<item name="colorAccent">@color/colorAccent</item>
|
|
</style>
|
|
|
|
</resources>
|
|
```
|
|
|
|
To build the application, add a `BUILD` file to `$APPLICATION_PATH`, and
|
|
`${appName}` and `${mainActivity}` in the manifest will be replaced by strings
|
|
specified in `BUILD` as shown below.
|
|
|
|
```
|
|
android_library(
|
|
name = "basic_lib",
|
|
srcs = glob(["*.java"]),
|
|
manifest = "AndroidManifest.xml",
|
|
resource_files = glob(["res/**"]),
|
|
deps = [
|
|
"//third_party:android_constraint_layout",
|
|
"//third_party:androidx_appcompat",
|
|
],
|
|
)
|
|
|
|
android_binary(
|
|
name = "helloworld",
|
|
manifest = "AndroidManifest.xml",
|
|
manifest_values = {
|
|
"applicationId": "com.google.mediapipe.apps.basic",
|
|
"appName": "Hello World",
|
|
"mainActivity": ".MainActivity",
|
|
},
|
|
multidex = "native",
|
|
deps = [
|
|
":basic_lib",
|
|
],
|
|
)
|
|
```
|
|
|
|
The `android_library` rule adds dependencies for `MainActivity`, resource files
|
|
and `AndroidManifest.xml`.
|
|
|
|
The `android_binary` rule, uses the `basic_lib` Android library generated to
|
|
build a binary APK for installation on your Android device.
|
|
|
|
To build the app, use the following command:
|
|
|
|
```
|
|
bazel build -c opt --config=android_arm64 $APPLICATION_PATH:helloworld
|
|
```
|
|
|
|
Install the generated APK file using `adb install`. For example:
|
|
|
|
```
|
|
adb install bazel-bin/$APPLICATION_PATH/helloworld.apk
|
|
```
|
|
|
|
Open the application on your device. It should display a screen with the text
|
|
`Hello World!`.
|
|
|
|
|
|
|
|
## Using the camera via `CameraX`
|
|
|
|
### Camera Permissions
|
|
|
|
To use the camera in our application, we need to request the user to provide
|
|
access to the camera. To request camera permissions, add the following to
|
|
`AndroidManifest.xml`:
|
|
|
|
```
|
|
<!-- For using the camera -->
|
|
<uses-permission android:name="android.permission.CAMERA" />
|
|
<uses-feature android:name="android.hardware.camera" />
|
|
```
|
|
|
|
Change the minimum SDK version to `21` and target SDK version to `27` in the
|
|
same file:
|
|
|
|
```
|
|
<uses-sdk
|
|
android:minSdkVersion="21"
|
|
android:targetSdkVersion="27" />
|
|
```
|
|
|
|
This ensures that the user is prompted to request camera permission and enables
|
|
us to use the [CameraX] library for camera access.
|
|
|
|
To request camera permissions, we can use a utility provided by MediaPipe
|
|
components, namely [`PermissionHelper`]. To use it, add a dependency
|
|
`"//mediapipe/java/com/google/mediapipe/components:android_components"` in the
|
|
`mediapipe_lib` rule in `BUILD`.
|
|
|
|
To use the `PermissionHelper` in `MainActivity`, add the following line to the
|
|
`onCreate` function:
|
|
|
|
```
|
|
PermissionHelper.checkAndRequestCameraPermissions(this);
|
|
```
|
|
|
|
This prompts the user with a dialog on the screen to request for permissions to
|
|
use the camera in this application.
|
|
|
|
Add the following code to handle the user response:
|
|
|
|
```
|
|
@Override
|
|
public void onRequestPermissionsResult(
|
|
int requestCode, String[] permissions, int[] grantResults) {
|
|
super.onRequestPermissionsResult(requestCode, permissions, grantResults);
|
|
PermissionHelper.onRequestPermissionsResult(requestCode, permissions, grantResults);
|
|
}
|
|
|
|
@Override
|
|
protected void onResume() {
|
|
super.onResume();
|
|
if (PermissionHelper.cameraPermissionsGranted(this)) {
|
|
startCamera();
|
|
}
|
|
}
|
|
|
|
public void startCamera() {}
|
|
```
|
|
|
|
We will leave the `startCamera()` method empty for now. When the user responds
|
|
to the prompt, the `MainActivity` will resume and `onResume()` will be called.
|
|
The code will confirm that permissions for using the camera have been granted,
|
|
and then will start the camera.
|
|
|
|
Rebuild and install the application. You should now see a prompt requesting
|
|
access to the camera for the application.
|
|
|
|
Note: If the there is no dialog prompt, uninstall and reinstall the application.
|
|
This may also happen if you haven't changed the `minSdkVersion` and
|
|
`targetSdkVersion` in the `AndroidManifest.xml` file.
|
|
|
|
### Camera Access
|
|
|
|
With camera permissions available, we can start and fetch frames from the
|
|
camera.
|
|
|
|
To view the frames from the camera we will use a [`SurfaceView`]. Each frame
|
|
from the camera will be stored in a [`SurfaceTexture`] object. To use these, we
|
|
first need to change the layout of our application.
|
|
|
|
Remove the entire [`TextView`] code block from
|
|
`$APPLICATION_PATH/res/layout/activity_main.xml` and add the following code
|
|
instead:
|
|
|
|
```
|
|
<FrameLayout
|
|
android:id="@+id/preview_display_layout"
|
|
android:layout_width="fill_parent"
|
|
android:layout_height="fill_parent"
|
|
android:layout_weight="1">
|
|
<TextView
|
|
android:id="@+id/no_camera_access_view"
|
|
android:layout_height="fill_parent"
|
|
android:layout_width="fill_parent"
|
|
android:gravity="center"
|
|
android:text="@string/no_camera_access" />
|
|
</FrameLayout>
|
|
```
|
|
|
|
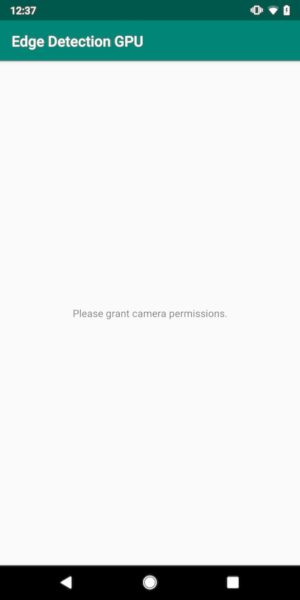
This code block has a new [`FrameLayout`] named `preview_display_layout` and a
|
|
[`TextView`] nested inside it, named `no_camera_access_preview`. When camera
|
|
access permissions are not granted, our application will display the
|
|
[`TextView`] with a string message, stored in the variable `no_camera_access`.
|
|
Add the following line in the `$APPLICATION_PATH/res/values/strings.xml` file:
|
|
|
|
```
|
|
<string name="no_camera_access" translatable="false">Please grant camera permissions.</string>
|
|
```
|
|
|
|
When the user doesn't grant camera permission, the screen will now look like
|
|
this:
|
|
|
|
|
|
|
|
Now, we will add the [`SurfaceTexture`] and [`SurfaceView`] objects to
|
|
`MainActivity`:
|
|
|
|
```
|
|
private SurfaceTexture previewFrameTexture;
|
|
private SurfaceView previewDisplayView;
|
|
```
|
|
|
|
In the `onCreate(Bundle)` function, add the following two lines _before_
|
|
requesting camera permissions:
|
|
|
|
```
|
|
previewDisplayView = new SurfaceView(this);
|
|
setupPreviewDisplayView();
|
|
```
|
|
|
|
And now add the code defining `setupPreviewDisplayView()`:
|
|
|
|
```
|
|
private void setupPreviewDisplayView() {
|
|
previewDisplayView.setVisibility(View.GONE);
|
|
ViewGroup viewGroup = findViewById(R.id.preview_display_layout);
|
|
viewGroup.addView(previewDisplayView);
|
|
}
|
|
```
|
|
|
|
We define a new [`SurfaceView`] object and add it to the
|
|
`preview_display_layout` [`FrameLayout`] object so that we can use it to display
|
|
the camera frames using a [`SurfaceTexture`] object named `previewFrameTexture`.
|
|
|
|
To use `previewFrameTexture` for getting camera frames, we will use [CameraX].
|
|
MediaPipe provides a utility named [`CameraXPreviewHelper`] to use [CameraX].
|
|
This class updates a listener when camera is started via
|
|
`onCameraStarted(@Nullable SurfaceTexture)`.
|
|
|
|
To use this utility, modify the `BUILD` file to add a dependency on
|
|
`"//mediapipe/java/com/google/mediapipe/components:android_camerax_helper"`.
|
|
|
|
Now import [`CameraXPreviewHelper`] and add the following line to
|
|
`MainActivity`:
|
|
|
|
```
|
|
private CameraXPreviewHelper cameraHelper;
|
|
```
|
|
|
|
Now, we can add our implementation to `startCamera()`:
|
|
|
|
```
|
|
public void startCamera() {
|
|
cameraHelper = new CameraXPreviewHelper();
|
|
cameraHelper.setOnCameraStartedListener(
|
|
surfaceTexture -> {
|
|
previewFrameTexture = surfaceTexture;
|
|
// Make the display view visible to start showing the preview.
|
|
previewDisplayView.setVisibility(View.VISIBLE);
|
|
});
|
|
}
|
|
```
|
|
|
|
This creates a new [`CameraXPreviewHelper`] object and adds an anonymous
|
|
listener on the object. When `cameraHelper` signals that the camera has started
|
|
and a `surfaceTexture` to grab frames is available, we save that
|
|
`surfaceTexture` as `previewFrameTexture`, and make the `previewDisplayView`
|
|
visible so that we can start seeing frames from the `previewFrameTexture`.
|
|
|
|
However, before starting the camera, we need to decide which camera we want to
|
|
use. [`CameraXPreviewHelper`] inherits from [`CameraHelper`] which provides two
|
|
options, `FRONT` and `BACK`. We can pass in the decision from the `BUILD` file
|
|
as metadata such that no code change is required to build another version of the
|
|
app using a different camera.
|
|
|
|
Assuming we want to use `BACK` camera to perform edge detection on a live scene
|
|
that we view from the camera, add the metadata into `AndroidManifest.xml`:
|
|
|
|
```
|
|
...
|
|
<meta-data android:name="cameraFacingFront" android:value="${cameraFacingFront}"/>
|
|
</application>
|
|
</manifest>
|
|
```
|
|
|
|
and specify the selection in `BUILD` in the `helloworld` android binary rule
|
|
with a new entry in `manifest_values`:
|
|
|
|
```
|
|
manifest_values = {
|
|
"applicationId": "com.google.mediapipe.apps.basic",
|
|
"appName": "Hello World",
|
|
"mainActivity": ".MainActivity",
|
|
"cameraFacingFront": "False",
|
|
},
|
|
```
|
|
|
|
Now, in `MainActivity` to retrieve the metadata specified in `manifest_values`,
|
|
add an [`ApplicationInfo`] object:
|
|
|
|
```
|
|
private ApplicationInfo applicationInfo;
|
|
```
|
|
|
|
In the `onCreate()` function, add:
|
|
|
|
```
|
|
try {
|
|
applicationInfo =
|
|
getPackageManager().getApplicationInfo(getPackageName(), PackageManager.GET_META_DATA);
|
|
} catch (NameNotFoundException e) {
|
|
Log.e(TAG, "Cannot find application info: " + e);
|
|
}
|
|
```
|
|
|
|
Now add the following line at the end of the `startCamera()` function:
|
|
|
|
```
|
|
CameraHelper.CameraFacing cameraFacing =
|
|
applicationInfo.metaData.getBoolean("cameraFacingFront", false)
|
|
? CameraHelper.CameraFacing.FRONT
|
|
: CameraHelper.CameraFacing.BACK;
|
|
cameraHelper.startCamera(this, cameraFacing, /*unusedSurfaceTexture=*/ null);
|
|
```
|
|
|
|
At this point, the application should build successfully. However, when you run
|
|
the application on your device, you will see a black screen (even though camera
|
|
permissions have been granted). This is because even though we save the
|
|
`surfaceTexture` variable provided by the [`CameraXPreviewHelper`], the
|
|
`previewSurfaceView` doesn't use its output and display it on screen yet.
|
|
|
|
Since we want to use the frames in a MediaPipe graph, we will not add code to
|
|
view the camera output directly in this tutorial. Instead, we skip ahead to how
|
|
we can send camera frames for processing to a MediaPipe graph and display the
|
|
output of the graph on the screen.
|
|
|
|
## `ExternalTextureConverter` setup
|
|
|
|
A [`SurfaceTexture`] captures image frames from a stream as an OpenGL ES
|
|
texture. To use a MediaPipe graph, frames captured from the camera should be
|
|
stored in a regular Open GL texture object. MediaPipe provides a class,
|
|
[`ExternalTextureConverter`] to convert the image stored in a [`SurfaceTexture`]
|
|
object to a regular OpenGL texture object.
|
|
|
|
To use [`ExternalTextureConverter`], we also need an `EGLContext`, which is
|
|
created and managed by an [`EglManager`] object. Add a dependency to the `BUILD`
|
|
file to use [`EglManager`], `"//mediapipe/java/com/google/mediapipe/glutil"`.
|
|
|
|
In `MainActivity`, add the following declarations:
|
|
|
|
```
|
|
private EglManager eglManager;
|
|
private ExternalTextureConverter converter;
|
|
```
|
|
|
|
In the `onCreate(Bundle)` function, add a statement to initialize the
|
|
`eglManager` object before requesting camera permissions:
|
|
|
|
```
|
|
eglManager = new EglManager(null);
|
|
```
|
|
|
|
Recall that we defined the `onResume()` function in `MainActivity` to confirm
|
|
camera permissions have been granted and call `startCamera()`. Before this
|
|
check, add the following line in `onResume()` to initialize the `converter`
|
|
object:
|
|
|
|
```
|
|
converter = new ExternalTextureConverter(eglManager.getContext());
|
|
```
|
|
|
|
This `converter` now uses the `GLContext` managed by `eglManager`.
|
|
|
|
We also need to override the `onPause()` function in the `MainActivity` so that
|
|
if the application goes into a paused state, we close the `converter` properly:
|
|
|
|
```
|
|
@Override
|
|
protected void onPause() {
|
|
super.onPause();
|
|
converter.close();
|
|
}
|
|
```
|
|
|
|
To pipe the output of `previewFrameTexture` to the `converter`, add the
|
|
following block of code to `setupPreviewDisplayView()`:
|
|
|
|
```
|
|
previewDisplayView
|
|
.getHolder()
|
|
.addCallback(
|
|
new SurfaceHolder.Callback() {
|
|
@Override
|
|
public void surfaceCreated(SurfaceHolder holder) {}
|
|
|
|
@Override
|
|
public void surfaceChanged(SurfaceHolder holder, int format, int width, int height) {
|
|
// (Re-)Compute the ideal size of the camera-preview display (the area that the
|
|
// camera-preview frames get rendered onto, potentially with scaling and rotation)
|
|
// based on the size of the SurfaceView that contains the display.
|
|
Size viewSize = new Size(width, height);
|
|
Size displaySize = cameraHelper.computeDisplaySizeFromViewSize(viewSize);
|
|
|
|
// Connect the converter to the camera-preview frames as its input (via
|
|
// previewFrameTexture), and configure the output width and height as the computed
|
|
// display size.
|
|
converter.setSurfaceTextureAndAttachToGLContext(
|
|
previewFrameTexture, displaySize.getWidth(), displaySize.getHeight());
|
|
}
|
|
|
|
@Override
|
|
public void surfaceDestroyed(SurfaceHolder holder) {}
|
|
});
|
|
```
|
|
|
|
In this code block, we add a custom [`SurfaceHolder.Callback`] to
|
|
`previewDisplayView` and implement the `surfaceChanged(SurfaceHolder holder, int
|
|
format, int width, int height)` function to compute an appropriate display size
|
|
of the camera frames on the device screen and to tie the `previewFrameTexture`
|
|
object and send frames of the computed `displaySize` to the `converter`.
|
|
|
|
We are now ready to use camera frames in a MediaPipe graph.
|
|
|
|
## Using a MediaPipe graph in Android
|
|
|
|
### Add relevant dependencies
|
|
|
|
To use a MediaPipe graph, we need to add dependencies to the MediaPipe framework
|
|
on Android. We will first add a build rule to build a `cc_binary` using JNI code
|
|
of the MediaPipe framework and then build a `cc_library` rule to use this binary
|
|
in our application. Add the following code block to your `BUILD` file:
|
|
|
|
```
|
|
cc_binary(
|
|
name = "libmediapipe_jni.so",
|
|
linkshared = 1,
|
|
linkstatic = 1,
|
|
deps = [
|
|
"//mediapipe/java/com/google/mediapipe/framework/jni:mediapipe_framework_jni",
|
|
],
|
|
)
|
|
|
|
cc_library(
|
|
name = "mediapipe_jni_lib",
|
|
srcs = [":libmediapipe_jni.so"],
|
|
alwayslink = 1,
|
|
)
|
|
```
|
|
|
|
Add the dependency `":mediapipe_jni_lib"` to the `mediapipe_lib` build rule in
|
|
the `BUILD` file.
|
|
|
|
Next, we need to add dependencies specific to the MediaPipe graph we want to use
|
|
in the application.
|
|
|
|
First, add dependencies to all calculator code in the `libmediapipe_jni.so`
|
|
build rule:
|
|
|
|
```
|
|
"//mediapipe/graphs/edge_detection:mobile_calculators",
|
|
```
|
|
|
|
MediaPipe graphs are `.pbtxt` files, but to use them in the application, we need
|
|
to use the `mediapipe_binary_graph` build rule to generate a `.binarypb` file.
|
|
|
|
In the `helloworld` android binary build rule, add the `mediapipe_binary_graph`
|
|
target specific to the graph as an asset:
|
|
|
|
```
|
|
assets = [
|
|
"//mediapipe/graphs/edge_detection:mobile_gpu_binary_graph",
|
|
],
|
|
assets_dir = "",
|
|
```
|
|
|
|
In the `assets` build rule, you can also add other assets such as TensorFlowLite
|
|
models used in your graph.
|
|
|
|
In addition, add additional `manifest_values` for properties specific to the
|
|
graph, to be later retrieved in `MainActivity`:
|
|
|
|
```
|
|
manifest_values = {
|
|
"applicationId": "com.google.mediapipe.apps.basic",
|
|
"appName": "Hello World",
|
|
"mainActivity": ".MainActivity",
|
|
"cameraFacingFront": "False",
|
|
"binaryGraphName": "mobile_gpu.binarypb",
|
|
"inputVideoStreamName": "input_video",
|
|
"outputVideoStreamName": "output_video",
|
|
},
|
|
```
|
|
|
|
Note that `binaryGraphName` indicates the filename of the binary graph,
|
|
determined by the `output_name` field in the `mediapipe_binary_graph` target.
|
|
`inputVideoStreamName` and `outputVideoStreamName` are the input and output
|
|
video stream name specified in the graph respectively.
|
|
|
|
Now, the `MainActivity` needs to load the MediaPipe framework. Also, the
|
|
framework uses OpenCV, so `MainActvity` should also load `OpenCV`. Use the
|
|
following code in `MainActivity` (inside the class, but not inside any function)
|
|
to load both dependencies:
|
|
|
|
```
|
|
static {
|
|
// Load all native libraries needed by the app.
|
|
System.loadLibrary("mediapipe_jni");
|
|
System.loadLibrary("opencv_java3");
|
|
}
|
|
```
|
|
|
|
### Use the graph in `MainActivity`
|
|
|
|
First, we need to load the asset which contains the `.binarypb` compiled from
|
|
the `.pbtxt` file of the graph. To do this, we can use a MediaPipe utility,
|
|
[`AndroidAssetUtil`].
|
|
|
|
Initialize the asset manager in `onCreate(Bundle)` before initializing
|
|
`eglManager`:
|
|
|
|
```
|
|
// Initialize asset manager so that MediaPipe native libraries can access the app assets, e.g.,
|
|
// binary graphs.
|
|
AndroidAssetUtil.initializeNativeAssetManager(this);
|
|
```
|
|
|
|
Now, we need to setup a [`FrameProcessor`] object that sends camera frames
|
|
prepared by the `converter` to the MediaPipe graph and runs the graph, prepares
|
|
the output and then updates the `previewDisplayView` to display the output. Add
|
|
the following code to declare the `FrameProcessor`:
|
|
|
|
```
|
|
private FrameProcessor processor;
|
|
```
|
|
|
|
and initialize it in `onCreate(Bundle)` after initializing `eglManager`:
|
|
|
|
```
|
|
processor =
|
|
new FrameProcessor(
|
|
this,
|
|
eglManager.getNativeContext(),
|
|
applicationInfo.metaData.getString("binaryGraphName"),
|
|
applicationInfo.metaData.getString("inputVideoStreamName"),
|
|
applicationInfo.metaData.getString("outputVideoStreamName"));
|
|
```
|
|
|
|
The `processor` needs to consume the converted frames from the `converter` for
|
|
processing. Add the following line to `onResume()` after initializing the
|
|
`converter`:
|
|
|
|
```
|
|
converter.setConsumer(processor);
|
|
```
|
|
|
|
The `processor` should send its output to `previewDisplayView` To do this, add
|
|
the following function definitions to our custom [`SurfaceHolder.Callback`]:
|
|
|
|
```
|
|
@Override
|
|
public void surfaceCreated(SurfaceHolder holder) {
|
|
processor.getVideoSurfaceOutput().setSurface(holder.getSurface());
|
|
}
|
|
|
|
@Override
|
|
public void surfaceDestroyed(SurfaceHolder holder) {
|
|
processor.getVideoSurfaceOutput().setSurface(null);
|
|
}
|
|
```
|
|
|
|
When the `SurfaceHolder` is created, we had the `Surface` to the
|
|
`VideoSurfaceOutput` of the `processor`. When it is destroyed, we remove it from
|
|
the `VideoSurfaceOutput` of the `processor`.
|
|
|
|
And that's it! You should now be able to successfully build and run the
|
|
application on the device and see Sobel edge detection running on a live camera
|
|
feed! Congrats!
|
|
|
|

|
|
|
|
If you ran into any issues, please see the full code of the tutorial
|
|
[here](https://github.com/google/mediapipe/tree/master/mediapipe/examples/android/src/java/com/google/mediapipe/apps/basic).
|
|
|
|
[`ApplicationInfo`]:https://developer.android.com/reference/android/content/pm/ApplicationInfo
|
|
[`AndroidAssetUtil`]:https://github.com/google/mediapipe/tree/master/mediapipe/java/com/google/mediapipe/framework/AndroidAssetUtil.java
|
|
[Bazel]:https://bazel.build/
|
|
[`CameraHelper`]:https://github.com/google/mediapipe/tree/master/mediapipe/java/com/google/mediapipe/components/CameraHelper.java
|
|
[CameraX]:https://developer.android.com/training/camerax
|
|
[`CameraXPreviewHelper`]:https://github.com/google/mediapipe/tree/master/mediapipe/java/com/google/mediapipe/components/CameraXPreviewHelper.java
|
|
[developer options]:https://developer.android.com/studio/debug/dev-options
|
|
[`edge_detection_mobile_gpu.pbtxt`]:https://github.com/google/mediapipe/tree/master/mediapipe/graphs/edge_detection/edge_detection_mobile_gpu.pbtxt
|
|
[`EglManager`]:https://github.com/google/mediapipe/tree/master/mediapipe/java/com/google/mediapipe/glutil/EglManager.java
|
|
[`ExternalTextureConverter`]:https://github.com/google/mediapipe/tree/master/mediapipe/java/com/google/mediapipe/components/ExternalTextureConverter.java
|
|
[`FrameLayout`]:https://developer.android.com/reference/android/widget/FrameLayout
|
|
[`FrameProcessor`]:https://github.com/google/mediapipe/tree/master/mediapipe/java/com/google/mediapipe/components/FrameProcessor.java
|
|
[`PermissionHelper`]: https://github.com/google/mediapipe/tree/master/mediapipe/java/com/google/mediapipe/components/PermissionHelper.java
|
|
[`SurfaceHolder.Callback`]:https://developer.android.com/reference/android/view/SurfaceHolder.Callback.html
|
|
[`SurfaceView`]:https://developer.android.com/reference/android/view/SurfaceView
|
|
[`SurfaceView`]:https://developer.android.com/reference/android/view/SurfaceView
|
|
[`SurfaceTexture`]:https://developer.android.com/reference/android/graphics/SurfaceTexture
|
|
[`TextView`]:https://developer.android.com/reference/android/widget/TextView
|